Ironman mode in Old School RuneScape presents unique challenges to training Mining. Unlike standard accounts‚ ironmen cannot trade for resources‚ making Mining essential for self-sufficiency. This guide will explore various methods‚ from early-game basics to advanced techniques‚ to help ironmen maximize their Mining efficiency.
Overview of Ironman Mining Challenges
Ironman Mining in Old School RuneScape presents significant hurdles compared to standard accounts. The inability to trade means ironmen must gather all their own resources‚ making Mining a crucial skill for progression. This limitation affects everything from acquiring basic ores for Smithing to obtaining higher-level materials for crafting and other skills. Inventory management is also a key challenge‚ as ironmen cannot simply bank excess ores freely; they must prioritize and often drop or utilize materials on the spot. Furthermore‚ traditional methods that rely on buying ores are completely off the table‚ forcing ironmen to be efficient and resourceful in their approach to training. This makes the journey slower‚ but much more rewarding‚ requiring careful planning and strategic choices to overcome these constraints. The reliance on self-sufficiency makes ironman Mining a unique and engaging experience.

Early Game Mining for Ironmen
For ironmen‚ early game Mining focuses on establishing a base for further progression. This involves efficiently gathering basic ores like copper and tin for early Smithing levels and quest requirements‚ while also getting started on your Mining skill.
Copper and Tin Mining in Lumbridge
The journey for an Ironman miner often begins in Lumbridge‚ a starting point for many adventurers. The southeast corner of the Lumbridge Swamp offers a convenient location to mine both copper and tin. This area is ideal for levels 1-15‚ providing a steady supply of the necessary ores to train both Mining and Smithing skills. Players can find these resources readily available in the mine‚ making it an accessible location. Mining copper and tin here allows ironmen to craft bronze bars‚ which are crucial for early-game tools and weapons. The close proximity to the Lumbridge furnace also helps in smelting those ores to get started with Smithing. It’s also an effective method to begin building levels in the early game before moving onto more efficient methods. Remember that this area may be crowded with other players‚ but the consistent ore spawns make it a reliable training spot. Focusing here will allow for a smoother transition to the mid-game content.
Mining Iron Near Varrock
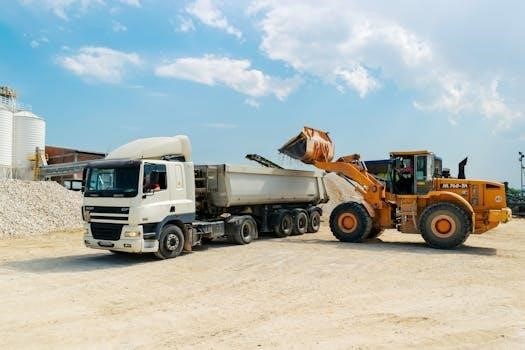
Once an Ironman miner has surpassed the initial stages‚ transitioning to mining iron near Varrock becomes a viable strategy. The mine located south-east of Varrock offers a concentrated area for iron ore‚ making it a popular spot for players. While this location might be more crowded than Lumbridge‚ the increased iron ore spawns provide better experience gains. This location also offers the benefit of being near a furnace in Al Kharid. This reduces travel time‚ allowing for efficient ore processing. Be aware that this area is very popular‚ and you will often have competition for the ores. However‚ the benefits of quicker iron acquisition make it a worthwhile option. Iron is a critical resource for ironmen‚ as it is used in many important early and mid-game items. This location is a strong stepping stone for ironmen before transitioning to more efficient training areas. Continue mining here until you feel ready to move on to more advanced locations for mining.
Iron Mining at the Legends Guild Mine
For ironmen seeking a more efficient iron mining experience‚ the Legends’ Guild mine‚ located north-east of East Ardougne‚ presents a fantastic option. This area is not only less crowded than Varrock’s mine‚ but it also provides a convenient shortcut using fairy rings. Ironmen can utilize the fairy ring code D-J-R to teleport to the Chasm of Fire in Great Kourend‚ which is near a bank. After banking‚ they can then use the fairy ring code B-L-R to return to the Legends’ Guild mine. This cycle dramatically reduces the downtime associated with banking. This convenient access to banking makes mining iron here very fast and efficient. This method is especially useful when you are saving large quantities of ore. This area provides a good experience per hour until granite becomes a viable option. This is a great step for ironmen who are looking to level their mining quickly.

Mid-Game Mining Strategies
As ironmen progress‚ they unlock access to more advanced mining methods. These include the Motherlode Mine‚ Volcanic Mine‚ and granite mining‚ each offering unique benefits for efficient mid-game training and progression.
Motherlode Mine for Ironman
The Motherlode Mine is a crucial mid-game training location for ironman accounts due to its unique mechanics. Unlike standard mining‚ it provides a variety of ores through pay-dirt‚ which is then processed for experience. Ironmen benefit greatly from the coal and gold obtained here‚ aiding both Smithing and other skills. The mine offers a decent experience rate and is considered fairly AFK‚ making it an attractive option. However‚ ironmen will need to rely on their own efforts to get the ore‚ since trading is not an option. Players can obtain gem bags as well‚ which can be used for crafting. The mining experience is not the fastest in the game‚ but it provides a good balance of experience and resources. The upper level of the mine offers a more efficient experience rate when compared to the lower level‚ but requires a higher mining level.
Volcanic Mine for Fast Experience
The Volcanic Mine offers a fast method for training Mining‚ making it a great option for ironmen seeking efficient experience gains. Unlike traditional mining‚ the Volcanic Mine involves a minigame-like experience where players work together to mine volcanic rocks. This method provides very high experience rates‚ especially when compared to other mid-game options. It also rewards players with points that can be spent on resources‚ including rune ore‚ which is highly valuable for ironman accounts. Though it is less AFK than some other methods‚ the high experience rates make it a worthwhile investment of time. The mine is also a social experience‚ which can be a nice change of pace. It’s considered one of the fastest non-tick manipulation methods for training mining. The requirements to participate are low‚ making it accessible to many ironman accounts.
Granite Mining at the Bandit Camp Quarry
Granite mining at the Bandit Camp Quarry is a notable method for ironmen‚ especially those seeking to rapidly level their Mining skill. This method is particularly effective for ironmen due to the ability to three-tick mine‚ significantly increasing experience rates. It becomes a viable option around level 45 mining and remains one of the fastest ways to reach level 99. The quarry is located in the Kharidian Desert‚ near the Bandit Camp‚ and offers granite of different sizes‚ each providing varying amounts of experience. While it can be click-intensive‚ the high experience rates make it a popular choice for those aiming for optimal training speeds. The process involves using specific actions to mine the rocks in a three-tick cycle‚ maximizing the output. This method is a significant step up from slower mining methods.

Advanced Mining Techniques
Reaching high levels in Mining requires mastering advanced techniques like three-tick mining for optimal speed‚ utilizing calcified rocks for unique resources‚ and understanding how mining synergies with Smithing for efficiency.
Three-Tick Mining for Optimal Speed
Three-tick mining is an advanced technique that allows for significantly faster experience rates by manipulating the game’s tick system. This method involves performing actions in a specific sequence that exploits the game’s mechanics‚ allowing players to mine more ore in a shorter time. It requires precise timing and can be challenging to learn but is highly rewarding for dedicated players. The most common implementation involves alternating between mining and another action‚ such as dropping items or using a specific tool‚ to reset the mining animation and significantly increase the rate of ore acquisition. This intensive method is not for everyone due to its high click intensity‚ but for those seeking maximum experience‚ it’s the most effective approach‚ particularly when training granite from level 45 onwards‚ and can often reduce the time taken to reach level 99 considerably.
Calcified Rocks
Calcified rocks are a relatively recent addition to Old School RuneScape‚ offering a unique way to train the Mining skill. These rocks are found in the Volcanic Mine and are distinct from regular ore deposits. They do not yield traditional ores but instead offer experience and points‚ which can be exchanged for a variety of useful items‚ including rune ore. Mining calcified rocks is particularly beneficial for Ironmen as it provides a good source of both Mining experience and valuable resources that can be used in Smithing or other skills. The Volcanic Mine‚ where these rocks are located‚ is a group activity‚ but it does not require a large team to be effective. This method is noted for being one of the fastest non-tick manipulation methods for training mining‚ and it is very effective for ironman accounts‚ reducing the tedium associated with traditional mining while providing useful rewards.
Mining and Smithing Synergies
For Ironman accounts‚ the synergy between Mining and Smithing is crucial for self-sufficiency. Efficiently training both skills together can significantly benefit progression. Mining ore and then immediately using a furnace to smelt it into bars will provide a good source of Smithing experience whilst also increasing the value of your mined resources. At lower levels‚ players can choose to pair this Mining training method with Smithing‚ by using Superheat Item to turn iron ore into iron bars. This method is good for players who also seek to train Magic‚ as it offers passive Magic experience while offering relatively fast Smithing experience as well. The Motherlode Mine is also a good method for this synergy as it provides ores that are useful for Smithing‚ even if the Mining experience is slower. Ultimately‚ focusing on both Mining and Smithing simultaneously provides a solid foundation for crafting essential equipment and supplies as an Ironman.

Additional Resources and Considerations
This section provides further insight into F2P vs P2P differences‚ gear‚ inventory management for efficient mining. Utilizing these resources will aid in optimizing your Ironman mining journey and overall progress.
F2P vs P2P Ironman Mining Differences
Free-to-play (F2P) Ironman mining is significantly more restricted compared to pay-to-play (P2P) due to limited resources and locations. F2P ironmen primarily rely on copper‚ tin‚ and iron‚ with limited access to higher-tier ores. The Motherlode Mine‚ Volcanic Mine‚ and granite mining are unavailable‚ impacting experience rates. Banking is also more cumbersome in F2P‚ as teleportation options are minimal‚ requiring more time for travel. P2P ironmen benefit from a wealth of options‚ including access to more efficient mining locations‚ better ores‚ and faster transportation methods. Members have access to the aforementioned Motherlode Mine‚ Volcanic Mine‚ and granite mining‚ enabling more efficient and varied training methods. They can also utilize fairy rings and other teleportation options for faster banking. Furthermore‚ P2P offers access to better mining gear‚ improving efficiency and experience gains. The differences make P2P training much more diverse and less tedious compared to the F2P grind.
Free-to-play Ironman Mining Guide
For free-to-play (F2P) Ironman accounts‚ mining starts with copper and tin in Lumbridge‚ aiming for level 15. The Lumbridge Swamp area is a convenient spot for this. Afterwards‚ move to the mine south-east of Varrock‚ though it tends to be crowded. Focus on mining iron here until a higher level. Due to inventory restrictions‚ “power mining” is recommended‚ which involves dropping ores instead of banking them to maximize experience gain. The lack of teleportation options in F2P means banking is time-consuming‚ making it more efficient to drop ores. A common strategy is to reach level 20 Attack and Strength for higher damage output‚ which is useful later on. Remember that mining iron at the Legends Guild mine is a good option for P2P‚ but not F2P. This method is more about maximizing efficiency with limited resources.
Gear and Inventory Management
Effective gear and inventory management are crucial for efficient Ironman mining. In early game‚ focus on obtaining the best pickaxe available‚ starting with bronze and progressing to steel. For inventory‚ prioritize space by using an axe to cut down trees for logs and dropping ores when your inventory is full. This method is called powermining. Later on‚ consider using the Ardougne cloak for teleportation and a dueling ring or games necklace to optimize trips to the bank. When smelting‚ use the closest furnaces such as the one north of Lumbridge castle‚ or the one south of the Varrock mine in Al Kharid. Remember‚ inventory management is essential for faster leveling. As an Ironman‚ you can’t rely on trading‚ so optimizing inventory is key for efficient mining sessions. Prioritizing inventory slots for ores‚ while utilizing other methods to bank is essential.